INTERFACES IN JAVA
MULTIPLE IMPLEMENTATION OF INTERFACES

In this second part, which is a bit more substantial than usual, we will finish the interface talk by analyzing the missing aspects. Let us look at the advantages in using interfaces with a somewhat more articulated example. We introduce two interfaces.

We declare the class AClass which implements both interfaces.

Let’s write a second class BClass which, however, implements only the second interface.

Let us summarize with a figure what has been written so far.

We create the test class.

We could not have done the same with BClass since it does not implement the IMyInterface1.

What you see in the test class is an example of polymorphism. Keeping in mind that the AClass and BClass could have belonged to different generalization hierarchies (inheritance) at this point we can see that the use of interfaces makes the application of polymorphism much more cross-cutting.

INHERITANCE BETWEEN INTERFACES
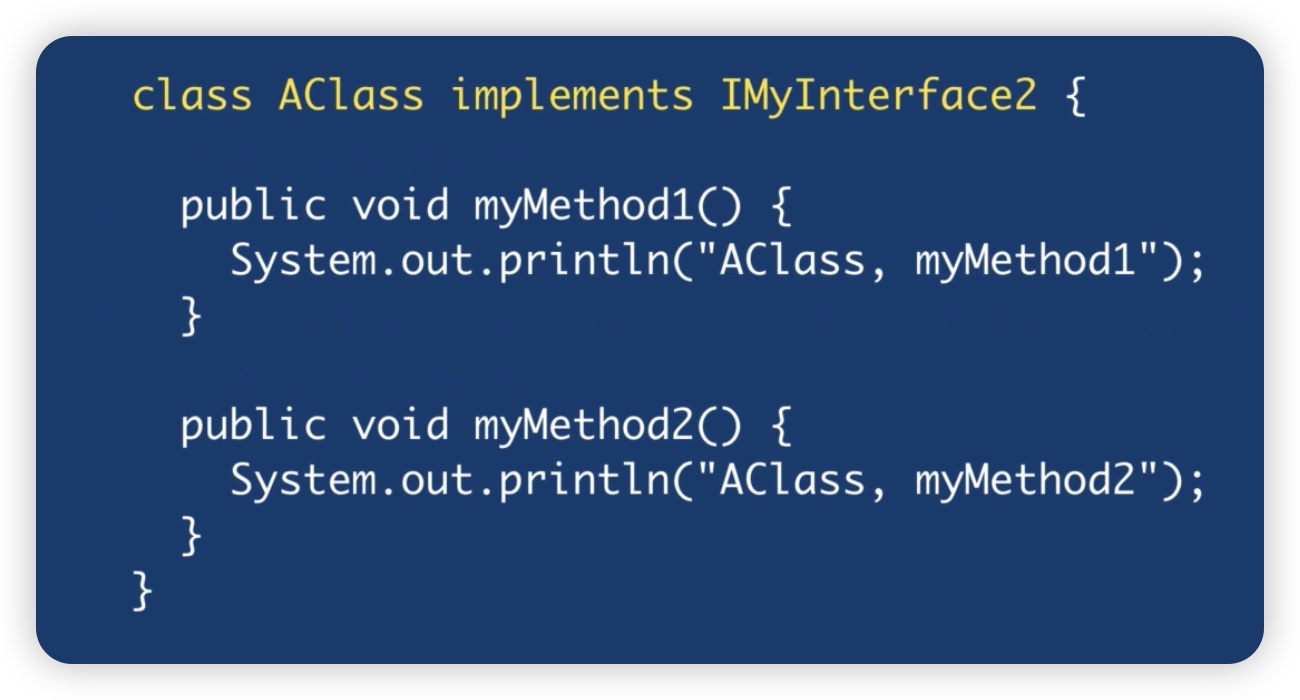
Interfaces like classes support specialization. Let’s look at an example.

The class that implements IMyInterface2 must implement myMethod1() and myMethod2().
Let’s look at the test class.

The figure summarizes the reported code.

DEFAULT METHODS IN THE INTERFACES
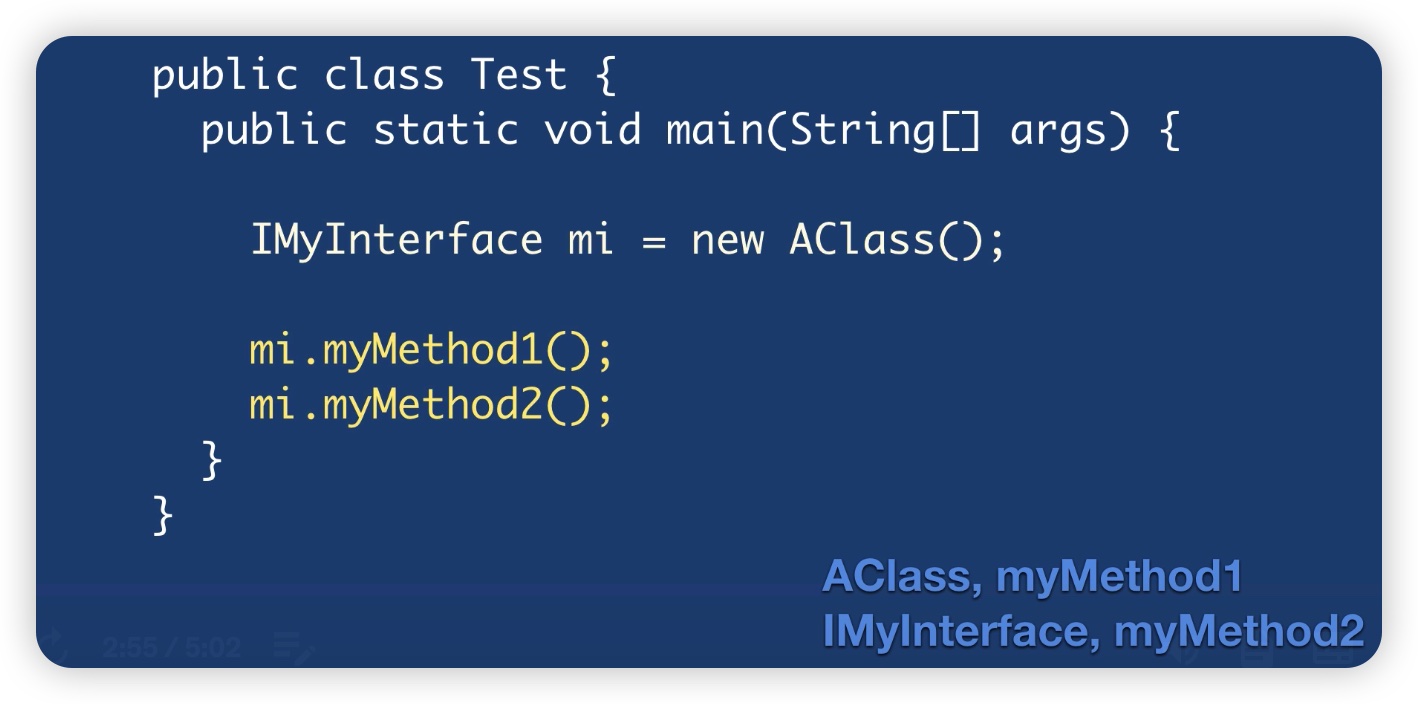
Interfaces in their most common use are containers of abstract methods. As of version eight, Java implements default methods in interfaces, introducing such methods some of them become optional in the classes that implement them. The designer of the class may decide on his own to not implement some methods, which are already defined in the interface, and to use the version already present without overriding them.

Let’s look at the class that implements it.

The figure shows the test class.
Nothing prevents us from overriding the default method by inserting a specific version within the class that implements it.
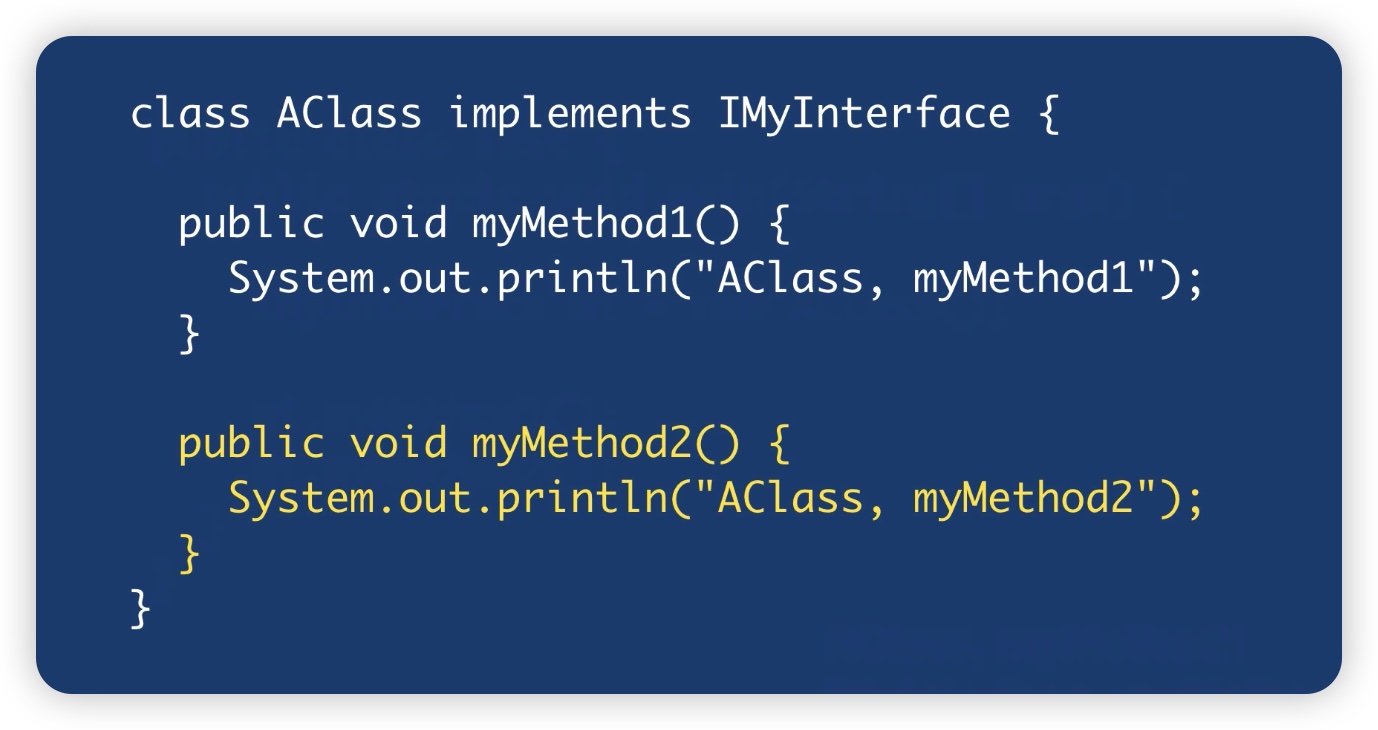
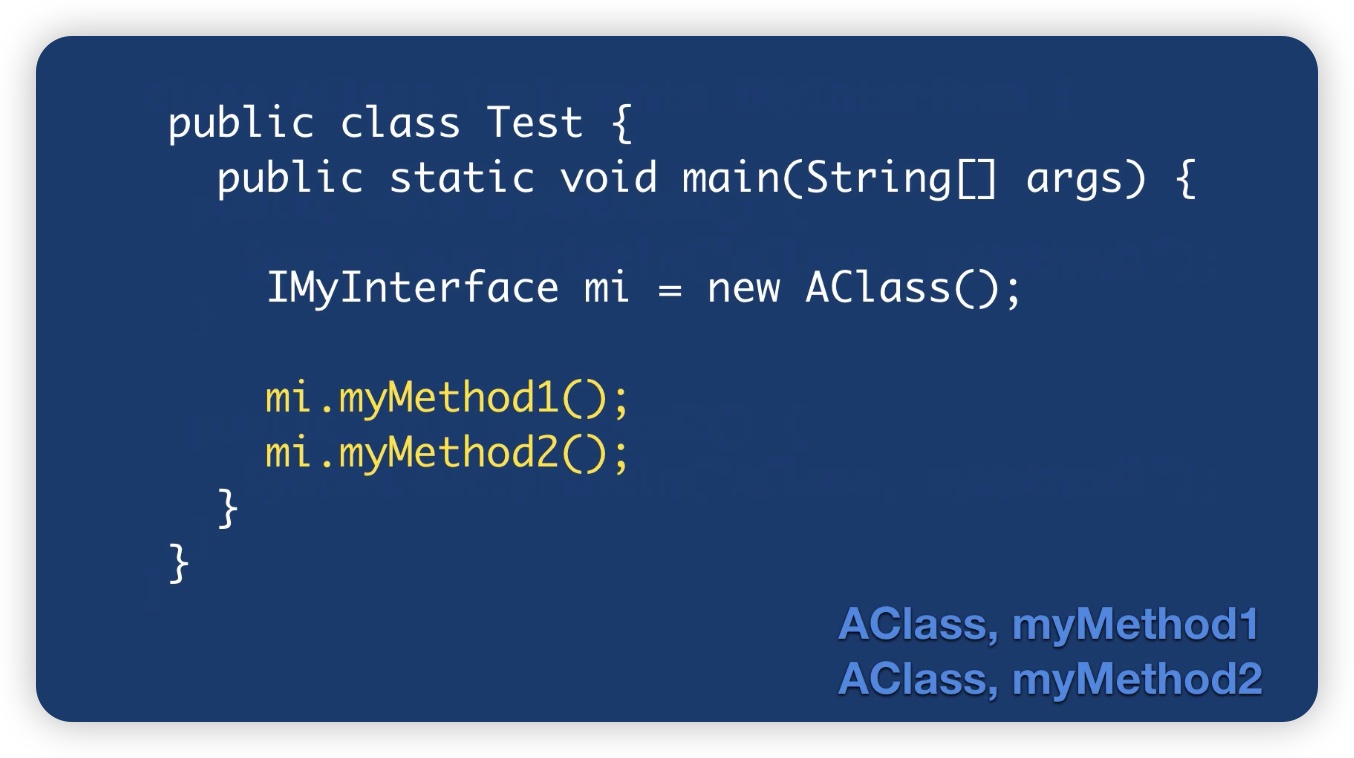
It will execute the override method defined in AClass. If we want, we can also invoke the default method defined in the interface. Let’s see how.

Both versions, the one defined in the class and the one defined in the interface, will be executed.

INTERFACE AND MULTIPLE INHERITANCE
The introduction of default methods in interfaces brings with it a potential problem. Let us try to understand this through examples.
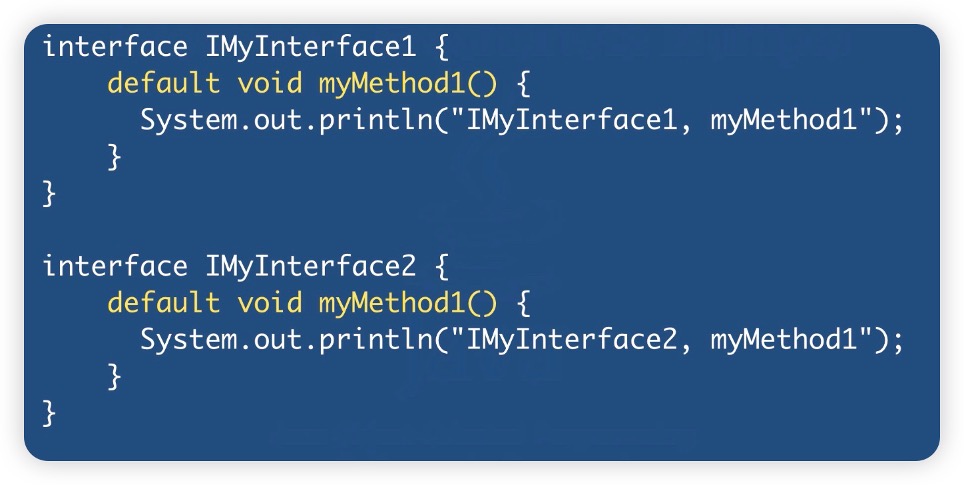
If we now go to declare a class that in fact implements both interfaces we are in trouble, in fact an error will be generated by the compiler. To solve the problem we need to override in the class that implements the interfaces.

We see another case where the compiler dictates a rule and executes it. In practice, the inheriting interface trumps the inherited interface; therefore, the method present in IMyInterface2 will be used.

Finally, one can resort to using super() to also execute the method defined in IMyInterface1.

PRIVATE AND STATIC METHODS IN AN INTERFACE
The private method is available only within the interface; it cannot in any way be used in the classes that implement it.

The only methods that can use a private method are the default methods. What are they for? Let’s say that with the introduction of default methods and then application logic, it becomes obvious to break down some of the application logic into simpler, reusable methods. We come to static methods.
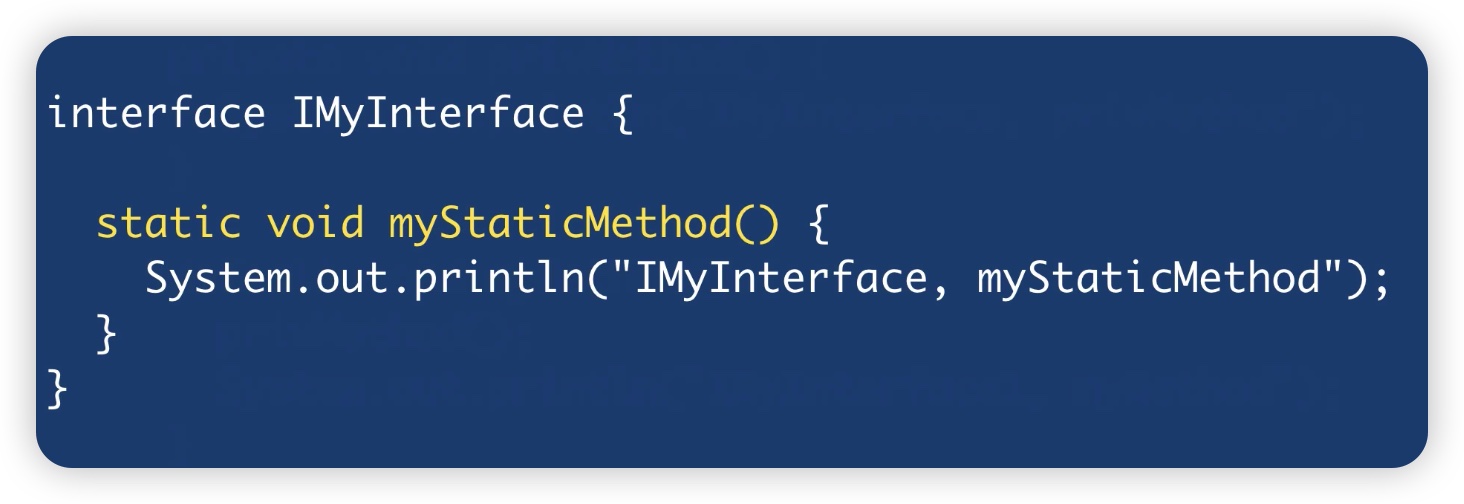
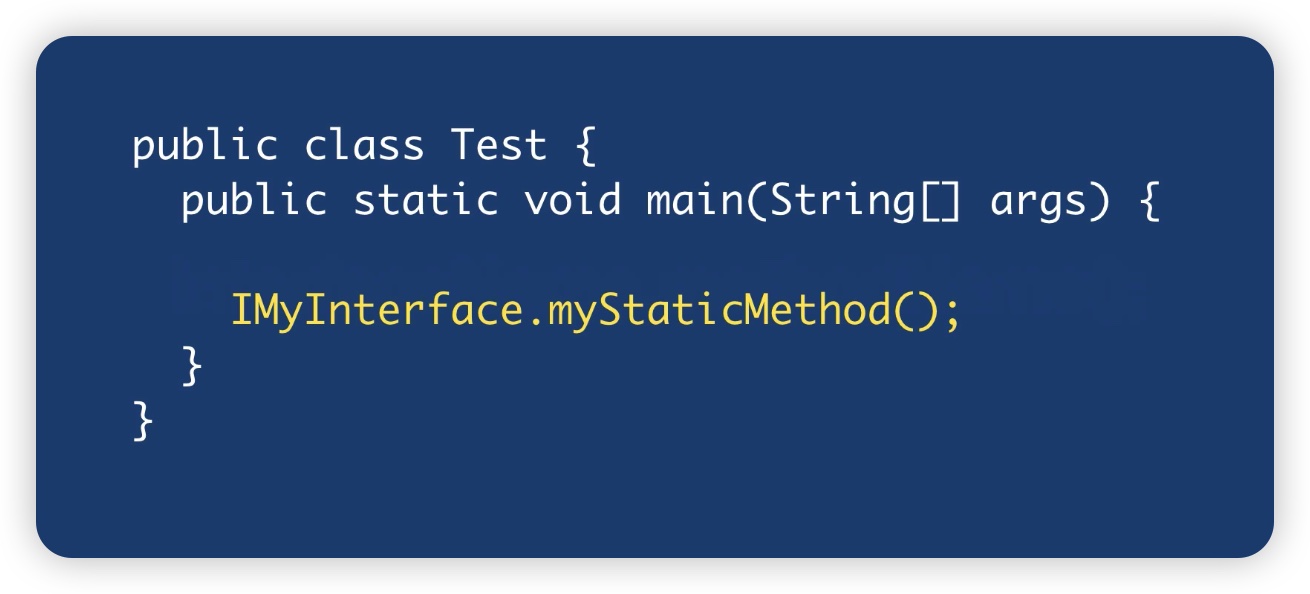
The same thing seen for static methods of classes also applies to static methods of interfaces; they are not instance methods but methods that belong to the interface. Let’s see how they are invoked.
INTRODUCTION TO ANNOTATIONS
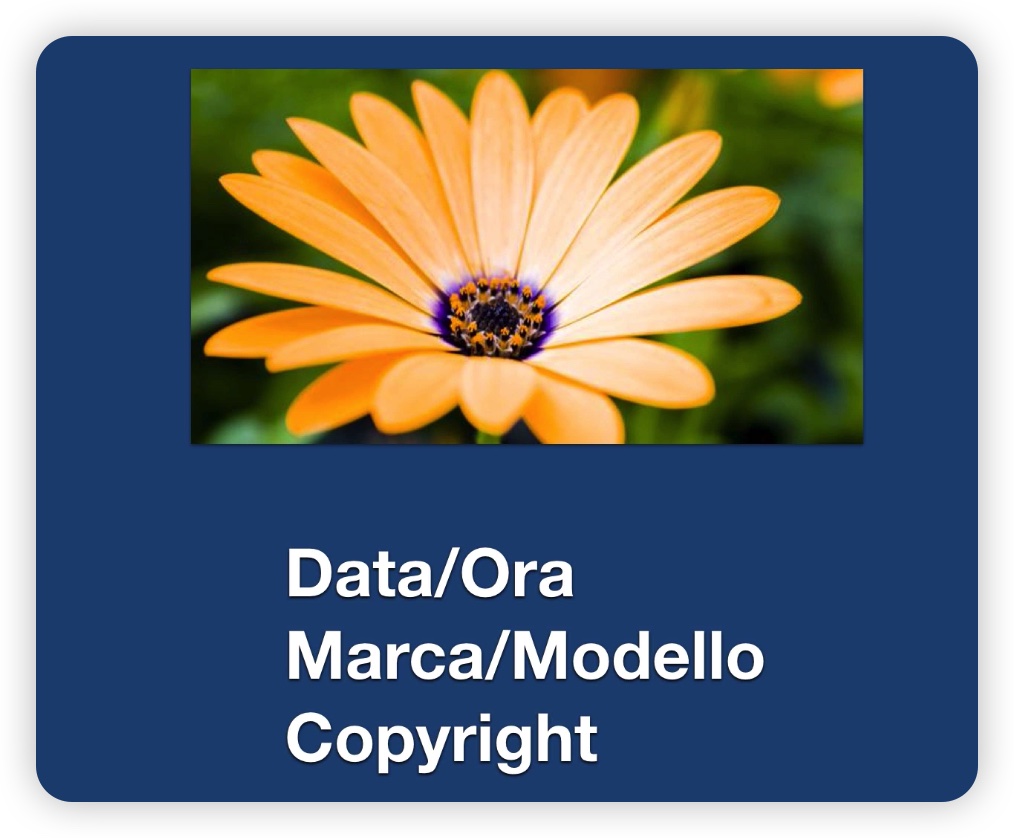
Annotations are a mechanism by which metadata can be provided that will then be interpreted by the Java tools and compiler itself. Let us now look at defining metadata. Let’s take a digital photograph. The main information we are most interested in is the image itself which shows a flower, however, there is other accompanying information, information about this photo that is called metadata, such as the date and time of the shot, the mark and model of the camera used, copyright information etc. Metadata if accompanied by a standard can be managed by tools for special reasons. Annotations are a particular type of interface. They too have accompanying metadata and are employed at various points in our software by tools and the compiler itself to perform particular tasks and checks.
Annotations are all derived from this interface. Let’s see how to declare an Annotation.


The methods are called annotation elements. Based on the number of elements we have three different categories.

Annotations that do not have any elements are Marker Annotations; the purpose is to mark their presence at a certain point in our code. When the annotation has only one element it is called Single-Value Annotation, if it has multiple elements Multi-Value Annotation. Let’s look at an example.

Elements are initialized with values as if they were attributes, values then used by tools or the compiler. We see a default Marker Annotation that Java gives us and that the compiler uses.
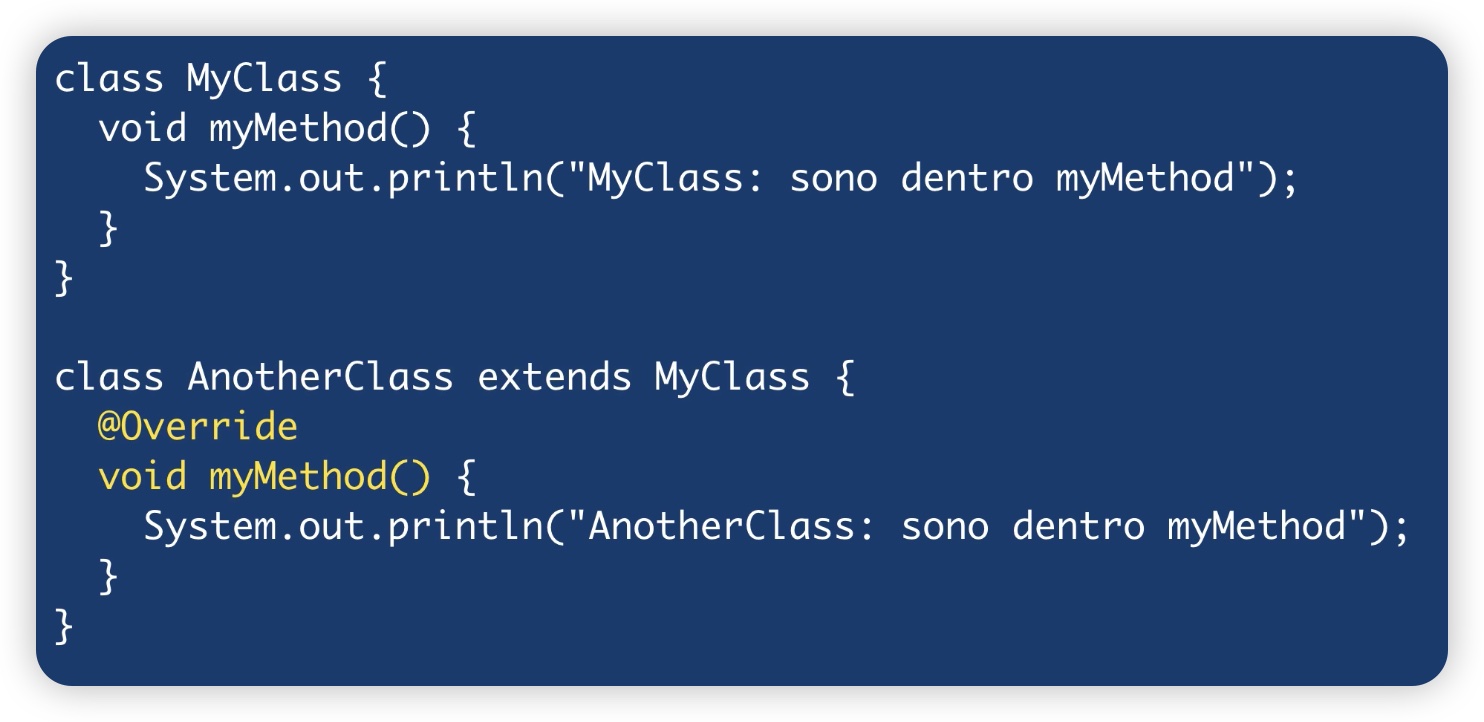
If we go to annotate a method in this way i.e. with @Override we are telling the compiler that we are going to override a method that is present in a superclass, however, if we go to change the name of the method the compiler produces an error due to the Annotation marker. This ensures that we write our programs in a more secure and controlled way.
LINKS TO PREVIOUS POSTS
LINK TO CODE ON GITHUB
EXECUTION OF THE EXAMPLE CODE
- Download the code from GITHUB, launch the JAR file with the following command in Visual Studio Code, locating in the directory containing the JAR.
java -jar –enable-preview CorsoJava.jar
- Or run the main found in the file CorsoJava.java.


Leave A Comment