THE DOTNET COMMAND
The dotnet command provides access to a wide range of functionality. We saw last section the new and run subcommand. Let us look at the most frequently used dotnet commands with a series of slides.

Let’s look at some commonly used commands.

A web application is not an island unto itself; rather, it will connect to third-party services to add functionality to the application itself.

To find out if there is a package visit nuget.org, for example, for an electronic invoicing package.

NUGET.ORG

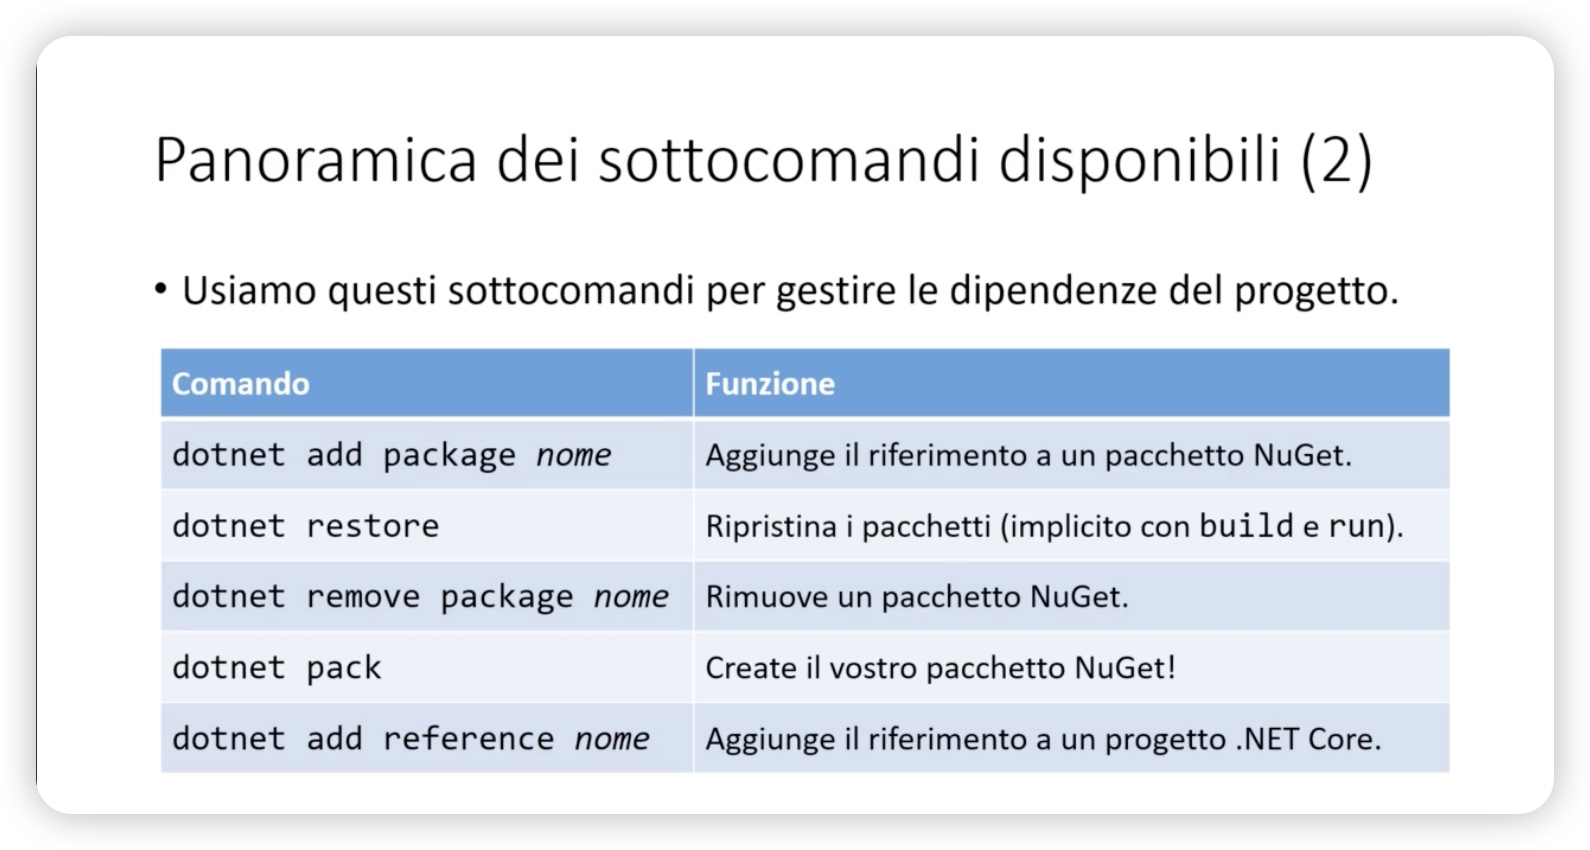
SUBCOMMANDS TO MANAGE PROJECT DEPENDENCIES

SECTION SUMMARY
The dotnet command has many subcommands, and it is easy to get lost at first. To help us take our first steps, the dotnet command comes with a built-in guide that you can call up at any time by adding –help at the end of the command. The guide is context-sensitive; here are some examples:
- dotnet –help displays all available subcommands;
- dotnet new –help displays all available templates from which to create a new application;
- dotnet new web –help displays the parameters of the given template (e.g., whether or not to use an HTTPS address, whether to add authentication functionality, and so on).
The guide can also be found online at the official Microsoft documentation site at https://docs.microsoft.com/en-us/dotnet/core/tools/
SOME USEFUL SUBCOMMANDS TO KNOW
The dotnet command gives us access to many features, each accessible from a specific subcommand. Let’s look at some of the most useful ones
- new to create new applications from a template;
- add to add references to NuGet packages or other projects;
- build to compile the project;
- run to run the application (which implicitly will also run the build, if necessary);
- dev-certs to manage the SSL certificates that we will use during development.
Choose a version of .NET Core SDK from those installed
All versions of .NET Core SDK installed in the system coexist “side by side”. It means that, at any time, we can decide which of them to use for the project we are working on. Within the project’s root directory, we create a file called global.json and place this content inside it, customizing, of course, the version of .NET Core SDK we intend to use.
- {
- “sdk”: {
- “version”: “2.1.402”
- }
- }
This same file can be created quickly by running the command: dotnet new globaljson
If we want to verify that the setting has taken effect, we display the version currently in use with the command:
dotnet –version
Choose a tool for writing code
To develop the application, we need to choose an editor or development environment that is right for us. We just have to choose the one we prefer. Here are some tips for making a decision:
- Visual Studio, is ideal for those who already have experience with the .NET Framework. It is a complete development environment that also includes profiling tools to measure the application’s CPU and RAM consumption. Its limitation is that it runs only on Windows;
- Visual Studio for Mac is for macOS users who want to build both ASP.NET Core applications and native mobile applications with Xamarin. Although it bears the name “Visual Studio,” it is not as complete as its Windows counterpart;
- Visual Studio Code is an editor available for all platforms. It is very lightweight and suitable for projects done with various languages and technologies. To create ASP.NET Core applications, we need to install the C# extension, which adds support for the language and provides various code typing aids. It is ideal for first-timers or developers who wish to have flexibility and work on different projects.


Leave A Comment